


【Chrome拡張機能開発】GitHubでmainブランチにいる時に目立たせて気付きたい

はじまり


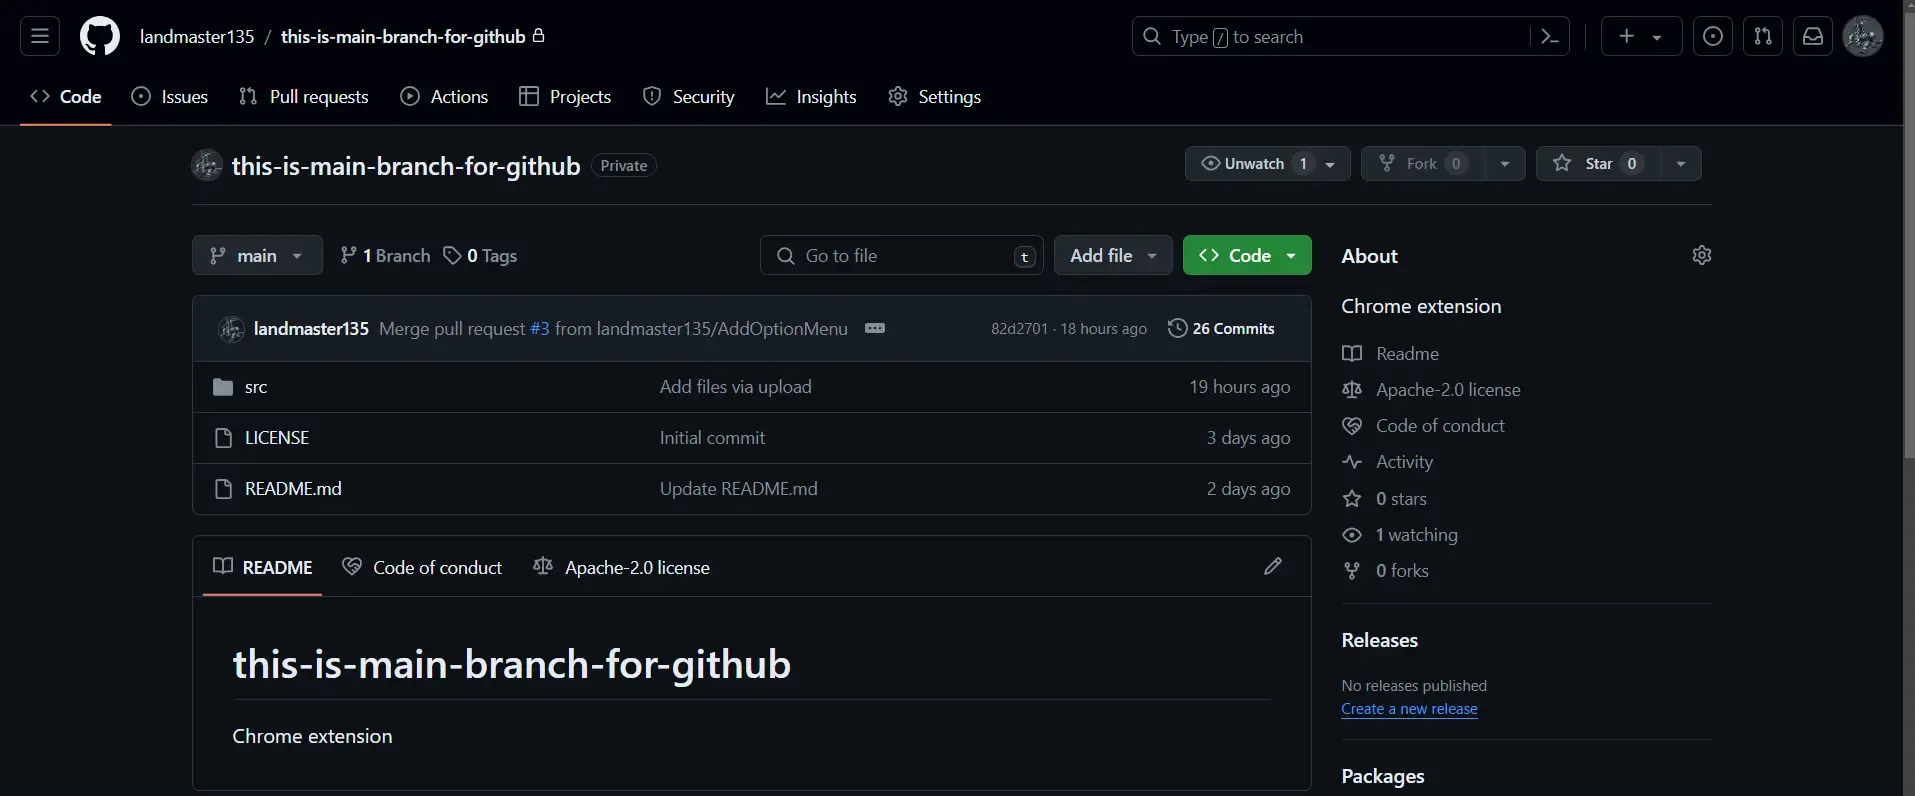
まず、何が起きてるんだ
自分、個人開発をしている時は、 GitHub をブラウザで開いてファイルをアップロード~。
といったことを結構するんですよね。
まあ、複数人で開発してたらあり得ないと思うんですけど、 GAS で開発してる時も(clasp は使っていない。) README とかいちいちローカルに持ってくるのが面倒なので、直接ファイルをアップロードしてます。
そして、その時にサブブランチではなくて、 main ブランチの方に push というかアップロードしてしまうことが結構ありまして、そうするとコミット履歴が汚くなってしまって、それが少し不満でした。(CLI を使うのは面倒。)
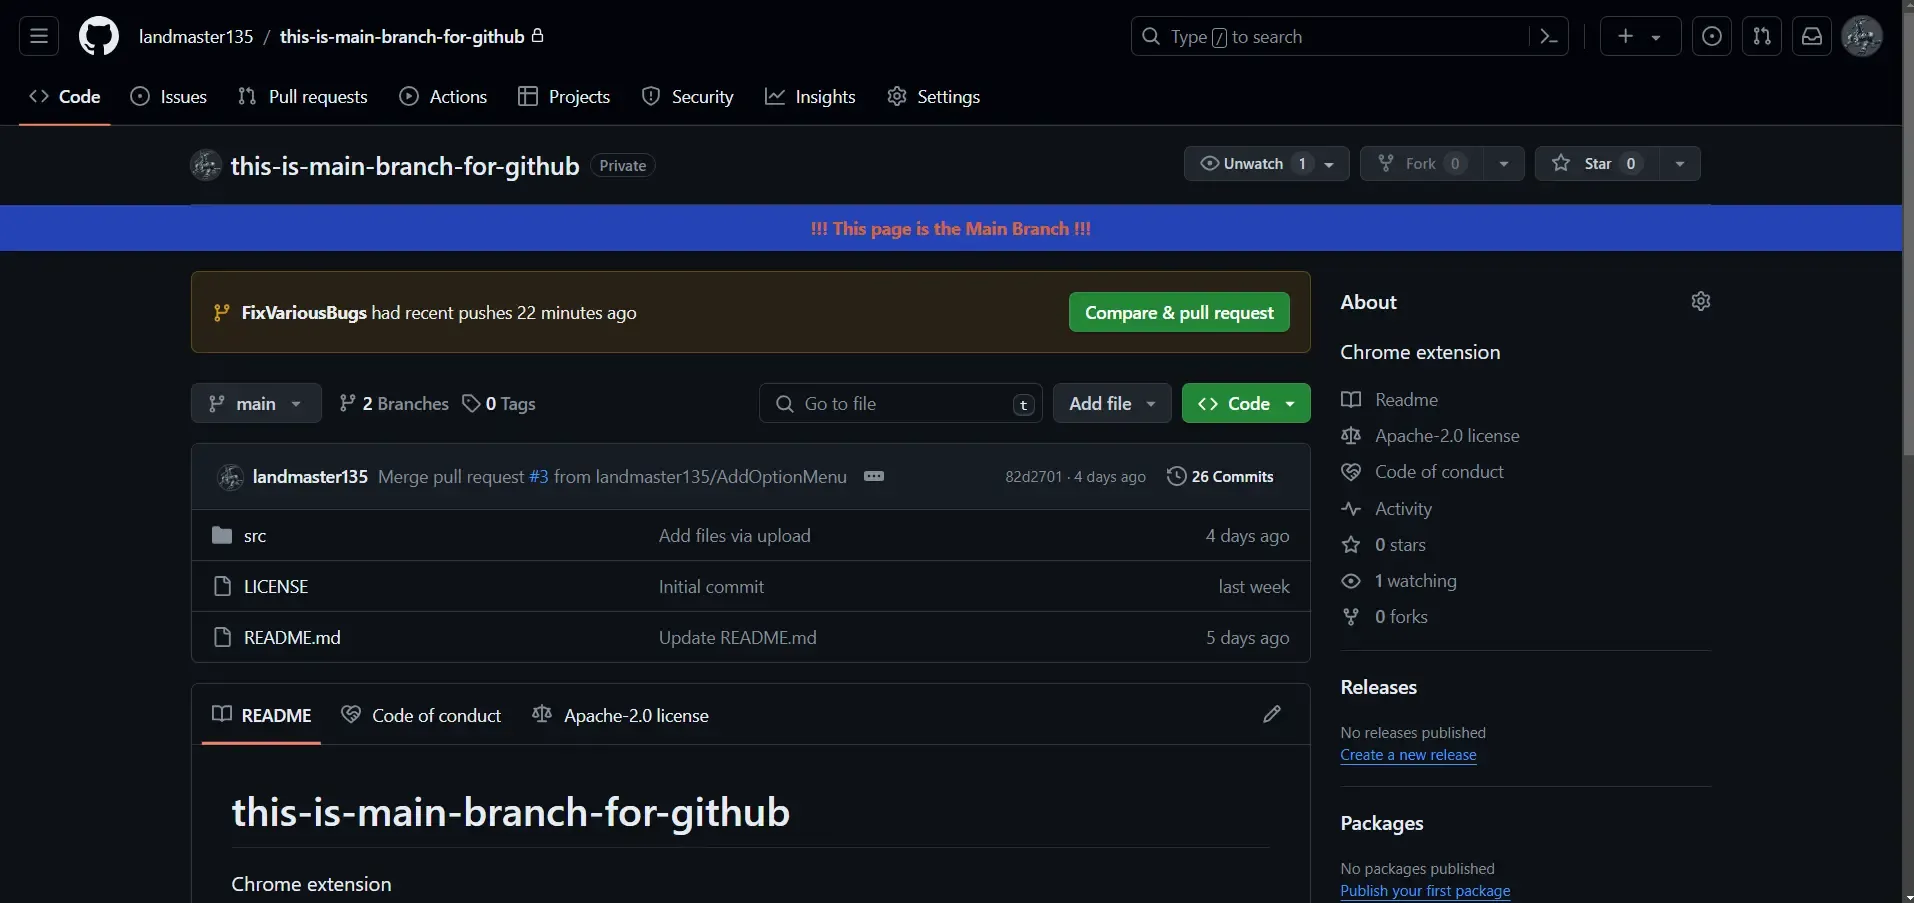
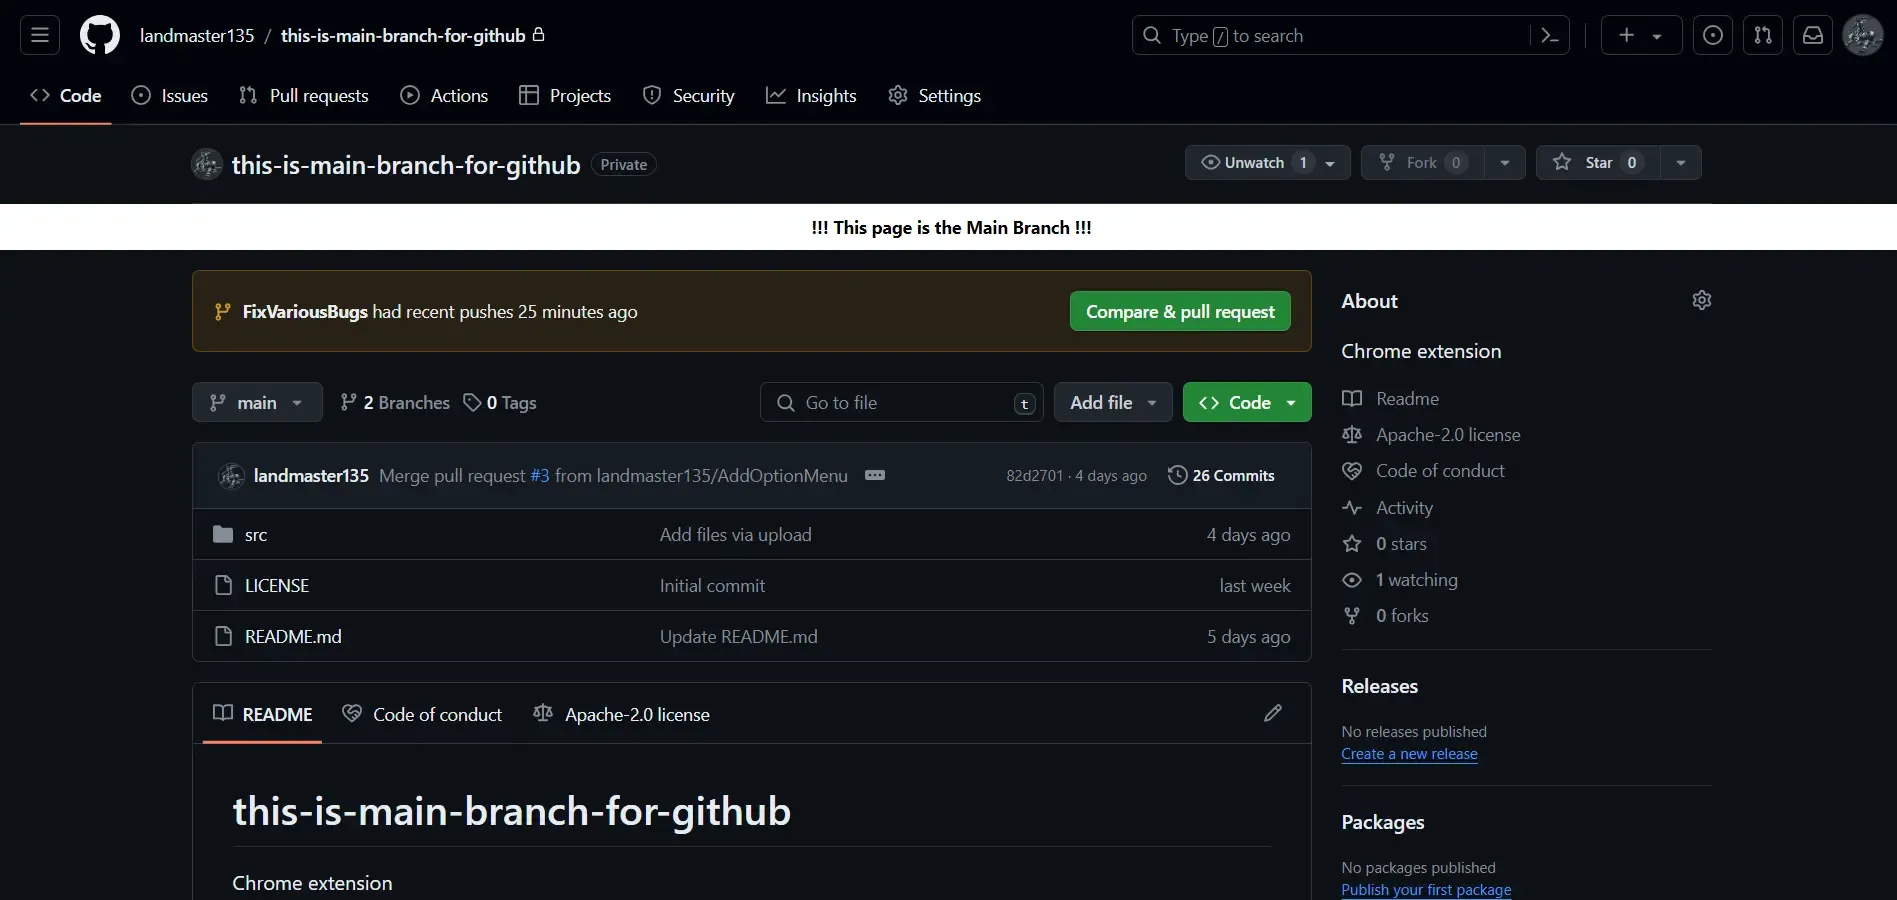
そこで、 main ブランチにアップロードするというヒューマンエラーを撲滅するために、 GitHub 上でmainブランチにいることを視覚的に目立たせる、Chrome拡張機能を作ります!
こんな感じになります。
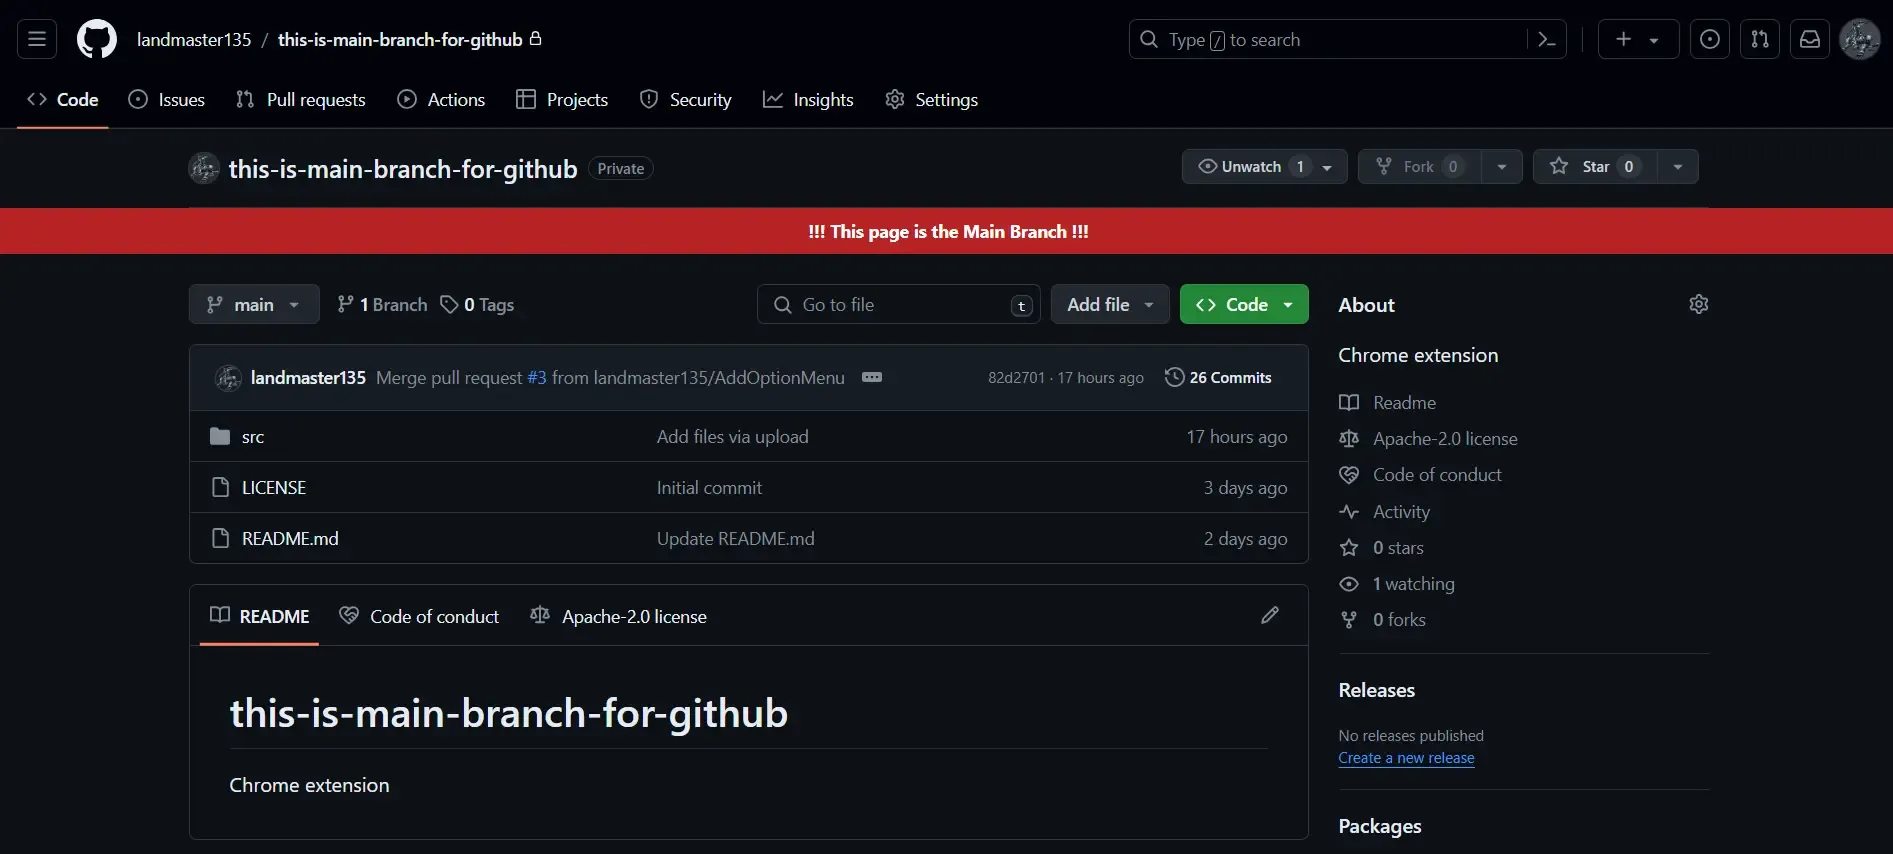
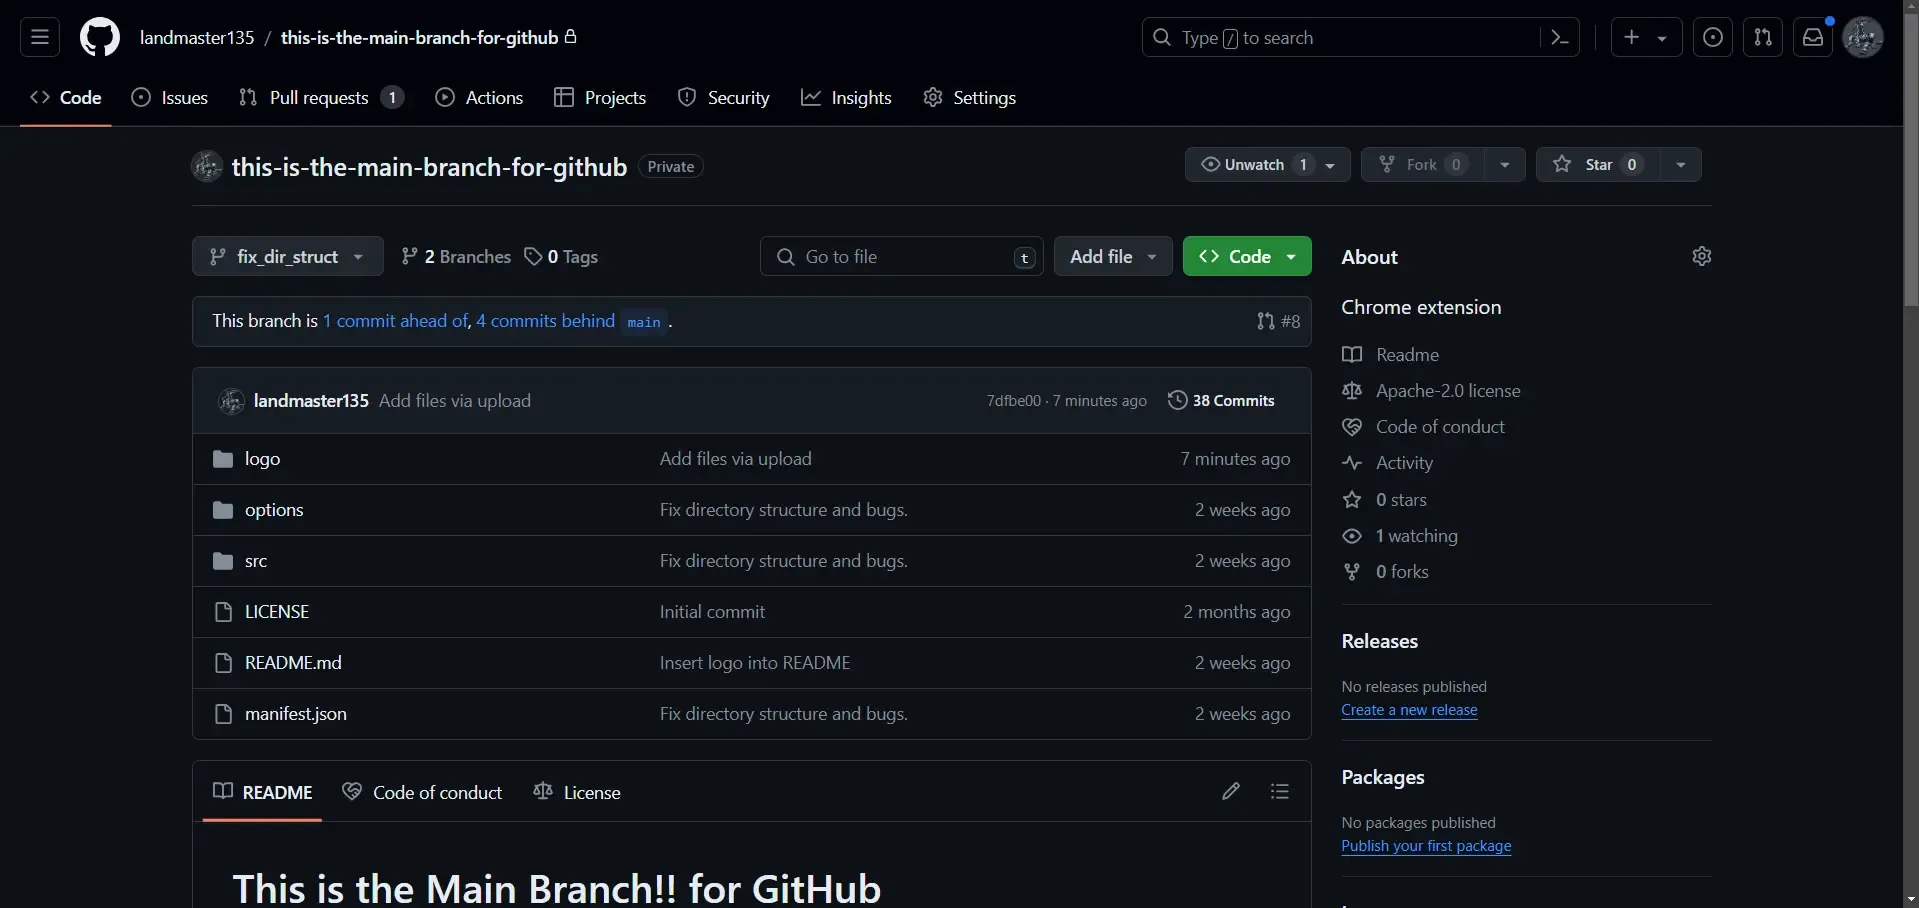
サブブランチだと、この帯は表示されません。
この記事について
この記事は、 Chrome 拡張機能を作ったことがない人や、最近作り始めた人を対象に解説する記事になります。
今回開発に使ったライブラリなど
この拡張機能の開発には、以下のライブラリを使用しています。
- Google Chrome ver. 123.0.6312.86
- 素の JavaScript
- jQuery
- jqColorPicker
具体的には、オプションページの作成に jQuery を活用し、さらにコンテンツスクリプトやバックグラウンドスクリプトでの処理には Vanilla JS を主に使用しています。これにより、開発の効率化と拡張機能のパフォーマンスが両立されています。
自作のChrome拡張機能の導入方法
Chrome 拡張機能を開発し、インストールするプロセスはシンプルです。
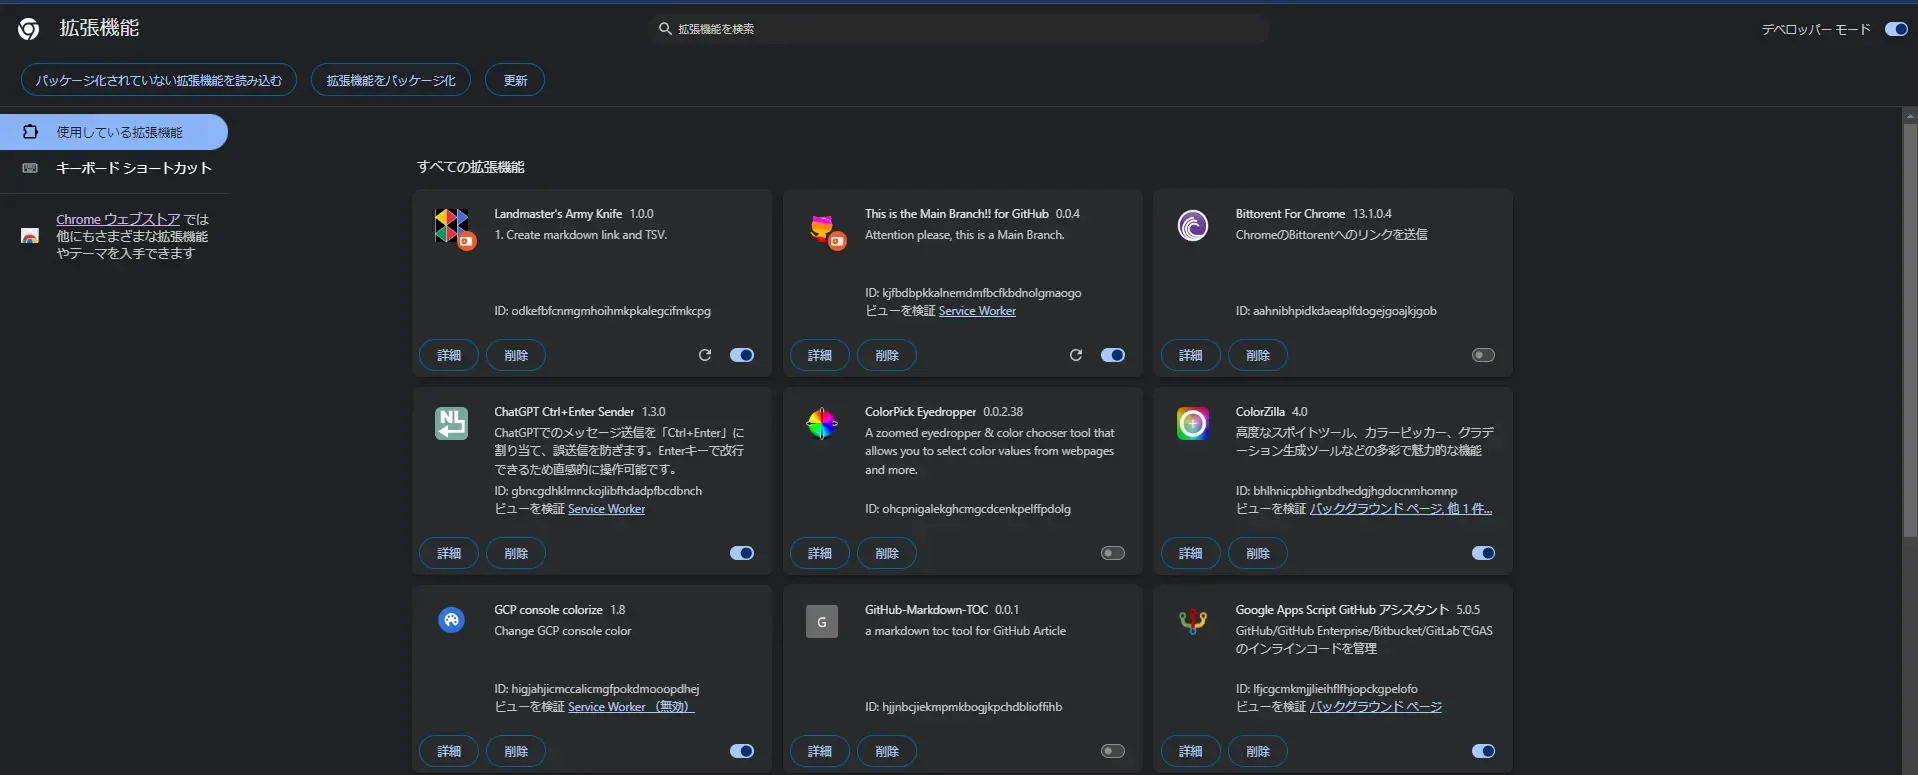
まずは、chrome://extensions/のURLを打ち込んで、Chrome 拡張機能を管理するページに飛びます。
遷移先のページの右上にある「デベロッパーモード」が ON になっていることを確認して、開発する拡張機能のフォルダを Chrome にドラッグ&ドロップするだけで、簡単に導入が可能です。
とりあえず、これでボチボチ開発していきますか・・・。
拡張機能の全体構成
今回作る拡張機能のディレクトリ構成はこんな感じです。
└─src │ background.js │ content.js │ manifest.json │ options.css │ options.html │ options.js │ ├─lib │ colorUtils.js │ config.js │ jqColorPicker.min.js │ jquery-3.7.1.min.js │ utils.js │ └─logo 128.png 16.png 48.pngmanifest.jsonの中身はこんな感じです。
"icons"は、拡張機能のアイコンが入っているフォルダです。16x16、48x48、128x128 のサイズの画像ファイルが入っています。実は、画像ファイルの大きさはピッタリその大きさである必要はありません。(ちなみに僕の128の画像のサイズは 500 くらいあります。)
"content_scripts"、"background"、"options_ui"でそれぞれ役割・機能を持った HTML および JavaScript を作成できます。(今回は"default_popup"は開発しません。)
{ "manifest_version": 3, "name": "This is the Main Branch!! for GitHub", "version": "0.0.4", "icons": { "16": "logo/16.png", "48": "logo/48.png", "128": "logo/128.png" }, "description": "Attention please, this is a Main Branch.", "content_scripts": [ { "all_frames": true, "matches": [ "https://github.com/*" ], "js": [ "lib/config.js", "lib/utils.js", "lib/colorUtils.js", "content.js" ] } ], "background": { "service_worker": "background.js" }, "permissions": [ "tabs", "scripting", "storage" ], "host_permissions": [ "https://github.com/*" ], "options_ui": { "page": "options.html" }}コンテンツスクリプトによる要素を描画する処理
まずは、content.jsというファイルをコネコネと作っていきます。
content.jsはコンテンツスクリプトというもので、コンテンツスクリプトは、特定の Web ページに対してJavaScriptを実行し、 DOM を操作するためのスクリプトです。
この拡張機能では、 GitHub のページがロードされたときにmainブランチにいるかをチェックし、該当する場合は特定の要素のスタイルを変更して目立たせます。
/** * @description Inserts a new DOM element before a reference element in the document. * @param {Element} newElement - The new element to insert. * @param {Element} referenceElement - The reference element before which the new element will be inserted. * @returns {boolean} True if the insertion was successful, otherwise false. */function insertDom(newElement, referenceElement) { // Insert a new element in front of the specified element. referenceElement.parentNode.insertBefore(newElement, referenceElement); return true;}
/** * @description Main function to make a notice on the page if it's the main or master branch of a repository. * @param {KeyboardEvent} event - The event object associated with the keydown event. * @returns {null} */function makeNoticeInPage(event) { const id = "notice-by-this-is-main-branch-for-github"; if (document.querySelector(`\#${id}`)) { console.log("Already noticed."); return; } const url = window.location.href; let targetSelector = getSelectorToMakeNotice(url); if (targetSelector === "") { console.log("Making notice is not executed..."); return; }
let referenceElement = document.querySelector(targetSelector); if (!referenceElement) { console.log("No specified element found."); return; } console.log("Specified element found!"); let text = `!!! This page is the Main Branch !!!`; // text = text.toUpperCase(); let newElement = createDom(text, id); insertDom(newElement, referenceElement); return;}
function main() { console.log("main: kkkkkkkkkkkkkkkkkkkkkkkkkkkkkkkkkkkkk"); makeNoticeInPage()}
main()この処理には、 DOM の操作が必須で、正確なセレクタの指定が重要です。
GitHub遷移時の検知にはサービスワーカーが必要
しかし、content.jsだけですと機能としては不十分です。
GitHub 内でのページ遷移は、通常のページロードとは異なり、 Single Page Application (SPA)かを使用した動的な内容の更新があります。
そして、このページ内の要素の動きの際に、 main ブランチの Code 画面に変化したことを検知できずに、content.jsがトリガーされないという問題が発生します。
くそう、なんてことだ・・・
そこで、この要素の動きを検知するにはバックグラウンドで動作する「サービスワーカー」が必要です。
サービスワーカーは、特定のイベントが発生したときに実行されるスクリプトで、この拡張機能では GitHub が開かれているタブが更新されたことを検知し、適切なタイミングでコンテンツスクリプトを実行するために使用します。
今回、サービスワーカーをbackground.jsとして作成します。
chrome.tabs.onUpdated.addListener(function (tabId, info, tab) { console.log("chrome.tabs.onUpdated.addListener is working."); try { if (info.status === 'complete' && tab.url.indexOf('https://github.com/') !== -1) { chrome.scripting.executeScript({ target: { tabId: tab.id }, files: ['./content.js'] }); } } catch (error) { console.log("Calling to 'content.js' is failed because of the error."); } console.log("chrome.tabs.onUpdated.addListener has worked.");});このサービスワーカーを作成することで、 GitHub 上で main ブランチを表示した時は漏れなく目立たせるヤツが表示されるようになりました。
オプションページによる色を設定する処理
次に、 GitHub で目立たせる要素の色を編集できるようにしていきたいと思います。
その手段としては、ユーザーが拡張機能の表示色をカスタマイズできるように、オプションページを提供することです。
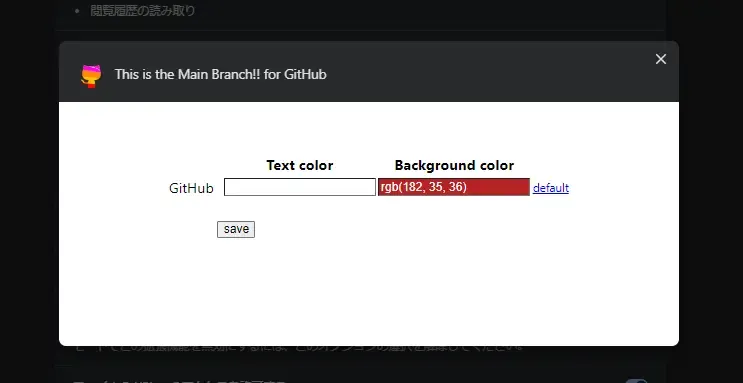
この画像のような UI を持ったオプションページを作成します。
オプションページは、options.htmlをベースにoptions.cssとoptions.jsで色々とスタイルや処理を追加していきます。
options.htmlはこんな感じです。
<html>
<head> <link rel="stylesheet" type="text/css" href="options.css"> <script type="text/javascript" src="lib/jquery-3.7.1.min.js"></script> <script type="text/javascript" src="lib/jqColorPicker.min.js"></script></head>
<body> <div id="container"> <table id="conditions"> <tr> <th></th> <th>Text color</th> <th>Background color</th> <th></th> </tr> </table> <button id="save">save</button> </div> <script type="text/javascript" src="lib/config.js"></script> <script type="text/javascript" src="lib/utils.js"></script> <script type="text/javascript" src="options.js"></script></body>
</html>ここでは、 jQuery を使用して UI を構築し、 Chrome の Storage API を介して設定値を保存していきます。
jQuery を利用した要素の追加
jQuery で要素を追加していく処理は、以下のような感じでoptions.jsに記載していきます。
// set event handlerのコメントがある行までは要素のスタイルを設定して、それ以降はイベントハンドラとそれに紐づく処理を記載していきます。
/** * @description Adds a condition row to the conditions table on the page. * @param {number{}{}} condition - The condition object containing text and background color. * @param {number{}{}} defaultCond - The default condition object to revert to. * @param {string} platform - The platform to manage repositories. * @returns {number{}{}} The condition object that was added. */function addCondition(condition, defaultCond, platform) { let $table = $(`#conditions`); let $condition = $(`<tr class="condition">`); let $pfName = `<td><p class="platform">${getPfConfig(platform)}</p></td>`; let color = `<td><input type="text" class="color"></input></td>`; let $colors = $(`${color}${color}`); let $default = $(`<td><a href="#" id="default">default</a></td>`); $condition.append($pfName); $condition.append($colors); $condition.append($default); $table.append($condition);
setColorToElement($colors.find(`.color`)[0], condition.txt_color.r, condition.txt_color.g, condition.txt_color.b); setColorToElement($colors.find(`.color`)[1], condition.bg_color.r, condition.bg_color.g, condition.bg_color.b);
// set event handler $default.click(event => { setColorToElement($colors.find(`.color`)[0], defaultCond.txt_color.r, defaultCond.txt_color.g, defaultCond.txt_color.b); setColorToElement($colors.find(`.color`)[1], defaultCond.bg_color.r, defaultCond.bg_color.g, defaultCond.bg_color.b); }); $(`.color`).colorPicker({ opacity: false, dark: `#fff`, light: `#fff`, }); console.log(`addCondition done.`);
return condition;}
/** * @description Sets the background color of a DOM element. * @param {HTMLElement} element - The DOM element to color. * @param {number} red - The red component of the color. * @param {number} green - The green component of the color. * @param {number} blue - The blue component of the color. * @returns {undefined} */function setColorToElement(element, red, green, blue) { let colorRgb = getColorString(red, green, blue); element.style.backgroundColor = colorRgb; element.value = colorRgb; return;}
/** * @description Constructs a color string from RGB values. * @param {number} red - The red component of the color. * @param {number} green - The green component of the color. * @param {number} blue - The blue component of the color. * @returns {string} The RGB color string. * @throws {TypeError} If any of the color components is not a number. */function getColorString(red, green, blue) { [red, green, blue].some(c => { if (typeof c !== "number") { throw new TypeError(`A color code must be number type.`); } return false; }); return `rgb(${red}, ${green}, ${blue})`;}これで、 UI 部分は出来ました。
Chrome の Storage API を使う処理(保存機能)
次に、カスタマイズした色を保存できるようにします。
そこで、 Chrome の Storage API は、拡張機能の設定情報などを保存するのに非常に便利な機能です。
この API を使って、オプションページで設定した色の情報を保存し、コンテンツスクリプトが実行されるたびにその情報を読み込み、設定された色でmainブランチを強調表示します。
Storage API での保存処理はこんな感じです。
/** * @description Saves the current conditions to Chrome's sync storage. * @returns {undefined} */function saveConditions() { console.log(`saveConditions started.`); let conditionObj = getConditionObjByClassName(`.condition`, `.color`); let setting = { conditions: conditionObj }; console.log(`save setting: `, setting);
chrome.storage.sync.set(setting, function () { console.log(`chrome.storage.sync.set started.`); const msg = `saved!`; console.log(msg); let $container = $(`#container`); let $message = $(`<span>${msg}</span>`); $container.append($message); setTimeout(function () { $message.remove(); }, 1000); console.log(`chrome.storage.sync.set terminated...`); }); console.log(`saveConditions terminated.`);}
/** * @description Generates an array of condition objects for each matching child of the selected parent elements. * @param {string} parentSelector - The selector for the parent elements. * @param {string} childSelector - The selector for the child elements. * @returns {number{}{}{}} An array of condition objects derived from the child elements' background colors. */function getConditionObjByClassName(parentSelector, childSelector) { // let conditions = []; let conditions = {}; $(parentSelector).each(function (i, elem) { let txtColor = $(elem).find(childSelector)[0].style.backgroundColor; let txtColorParts = getColorsByRegex(txtColor); let bgColor = $(elem).find(childSelector)[1].style.backgroundColor; let bgColorParts = getColorsByRegex(bgColor); conditions.github = getConditionObj( ...parseIntAll([txtColorParts[1], txtColorParts[2], txtColorParts[3], bgColorParts[1], bgColorParts[2], bgColorParts[3]]) ); }); return conditions;}
/** * @description Creates an object containing text and background color information. * @param {number} txtRed - The red component of the text color. * @param {number} txtGreen - The green component of the text color. * @param {number} txtBlue - The blue component of the text color. * @param {number} bgRed - The red component of the background color. * @param {number} bgGreen - The green component of the background color. * @param {number} bgBlue - The blue component of the background color. * @returns {number{}{}} An object with `txt_color` and `bg_color` properties. * @throws {TypeError} If any color component is not a number. */function getConditionObj(txtRed, txtGreen, txtBlue, bgRed, bgGreen, bgBlue) { [txtRed, txtGreen, txtBlue, bgRed, bgGreen, bgBlue].some(c => { if (typeof c !== "number") { throw new TypeError(`'c' must be number type.`); } return false; }); return { txt_color: { r: txtRed, g: txtGreen, b: txtBlue, }, bg_color: { r: bgRed, g: bgGreen, b: bgBlue, } }}ChromeのStorage APIを使う処理(保存機能)
次に、保存した色を Storage から取り出せるようにします
/** * @description Asynchronously retrieves setting object from Chrome's storage. * @returns {Promise<number{}{}{}{}>} A promise that resolves with the setting object containing conditions. */function getSettingObjFromChromeStorage() { let defaultSetting = { conditions: [] }; const colorConfig = getColorConfig(); const defaultTxtColor = colorConfig.github.txt; const defaultBgColor = colorConfig.github.bg; const defaultCond = getConditionObj( defaultTxtColor.r , defaultTxtColor.g , defaultTxtColor.b , defaultBgColor.r , defaultBgColor.g , defaultBgColor.b ); let conditions = { github: JSON.parse(JSON.stringify(defaultCond)) }; return new Promise((resolve, reject) => { chrome.storage.sync.get(defaultSetting, function (setting) { console.log(`get setting: `, setting); if (setting.hasOwnProperty("conditions")) { console.log(`getSettingObjFromChromeStorage : aaaaaaaaaaaaaaaaaaaaaaaaaaaaaaaaaa`) conditions = setting.conditions; }
console.log(conditions) console.log(`getSettingObjFromChromeStorage : bbbbbbbbbbbbbbbbbbbbbbbbbbbbbbbbbbbbbb`)
let condObj = { set_colors: conditions, default_colors: defaultCond }; resolve(condObj); }); })}これにより、ユーザーは自分の好みに合わせてmainブランチを目立たせる色を選択できます。
Promiseによる非同期メソッドチェーン
そして、 Chrome の Storage API を利用することで、この拡張機能において、非同期処理が挟まるようになってきました。 Storage からまだ値を取得していない状態で、目立たせる処理に行くと、処理が失敗してしまいます。 そこで、
「Storage API が関連する処理はStorageを参照しているスコープの中に全部収めてしまおう!」
chrome.storage.sync.get(defaultSetting, function (setting) {
// いや~、こんなに長いと見にくいですよねぇ
});しかし、そんなことをすると、一つ一つの変数のスコープがとても長くなって、処理の順序が分かりづらく、メンテしにくいコードになってしまいそうです。
その一連の非同期処理を小分けのメソッドに分割する必要がありそうです。
そこで、Promiseチェーンを下記のように連ねていきます。
function makeNoticeInPage(event) { getSettingObjFromChromeStorage() .then(obj => { const url = window.location.href; let targetSelector = getSelectorToMakeNotice(url); if (targetSelector === "") { throw new RangeError("Making notice is not executed..."); } obj.targetSelector = targetSelector; return new Promise((resolve, reject) => { resolve(obj); }); }) .then(obj => { let referenceElement = document.querySelector(obj.targetSelector); if (!referenceElement) { throw new RangeError("No specified element found."); } console.log("Specified element found!"); obj.referenceElement = referenceElement; return new Promise((resolve, reject) => { resolve(obj); }); }) .then(obj => { const id = "notice-by-this-is-main-branch-for-github"; if (document.querySelector(`\#${id}`)) { throw new RangeError("Already noticed."); } obj.id = id; return new Promise((resolve, reject) => { resolve(obj); }); }) .then(obj => { let text = `!!! This page is the Main Branch !!!`; // text = text.toUpperCase(); let colorObj = { txt_color: obj.set_colors.github.txt_color , bg_color: obj.set_colors.github.bg_color }; let newElement = createDom(text, obj.id, colorObj); obj.newElement = newElement; return new Promise((resolve, reject) => { resolve(obj); }); }) .then(obj => { insertDom(obj.newElement, obj.referenceElement); return new Promise((resolve, reject) => { resolve(obj); }); }) .then(obj => { console.log(`makeNoticeInPage is terminated...`); }) .catch(error => { console.log(error); });
return;}基本的に一つのオブジェクトの中に、一つ一つの非同期処理で取得した情報を格納して、次の非同期処理に渡していく流れです。
一旦、完成!
この流れで、 GitHub の main ブランチに居ることを、自分の好きな色で目立たせることが出来る Chrome 拡張機能が完成しました。
最初の拡張機能開発でフロントエンドもそんなに触ったことが無かったので、分からないことが多くて苦労しましたが、一旦こんなもので。
まとめ
この記事では、 GitHub でmainリポジトリにいることを視覚的に目立たせる Chrome 拡張機能の開発について解説しました。
- コンテンツスクリプトの使用
- サービスワーカーによるページ遷移の検知
- オプションページでの色設定
- Storage API の利用
Promiseによる非同期処理の効率化
など、拡張機能開発の基本から解説しました。
拡張機能を作る時の参考として、ぜひ役立てて下さい。
おしまい

以上になります!
記事を共有
この記事が役に立ったなら、ぜひ他の人と共有してください!
音楽
再生中なし