


【PowerShell】iTextSharpでPDFを暗号化する

はじまり


PDFにパスワードを付ける
PDFファイルには、正しいパスワードを入力しないと開けないようにすることが出来る暗号化機能があります。
しかし、その暗号化を施すためには、Adobe Acrobatのような高価なPDFエディタを使ったり、オンラインのPDFツールにアップロードする必要があったりします。暗号化するようなPDFファイルなのですから、中の情報が独り歩きしてしまうような懸念を減らしたいです。
そこで今回は、「iTextSharp」というパッケージをローカルにダウンロードして、そのパッケージとPowerShellのみでその暗号化を完結できるように、PDFにパスワードを付ける処理を実装していきたいと思います。それでは行ってみましょう。
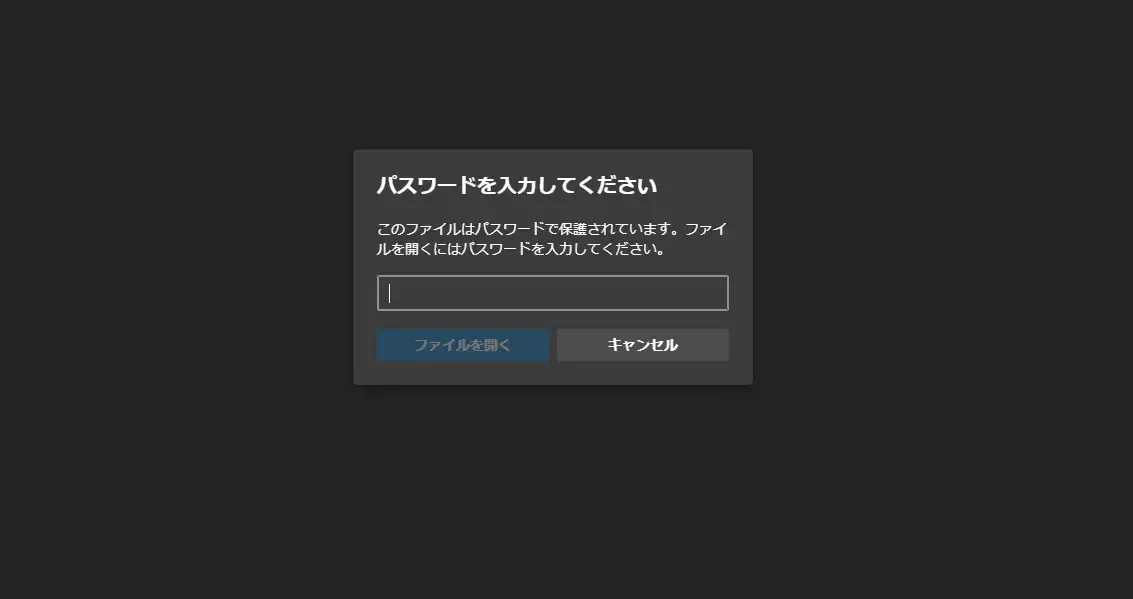
ちなみに、PDFをちゃんと暗号化出来ると、Microsoft EdgeなどでPDFを開いた時にこのようなパスワード入力画面が表示されるようになります。
iTextSharpでPDFを暗号化する
それではまずは、iTextSharpをローカルにダウンロードします。このiTextSharpのパッケージのバージョンですが、今回は「5.5.13」を使います。
iTextSharpの新しいバージョンを利用すると、沼にハマる可能性があります。非推奨です。以下の記事でもそのことを紹介しています。
そして、PDFを暗号化するための処理を以下のように実装しました。
ChatGPT、NVIDIA NemotronやGeminiに聞きましたが、最も良い回答をくれたのはGeminiでしたね。iTextSharpを実際に使う部分でお世話になりました。(NVIDIA Nemotronは、iTextSharpの二重インポートを阻止するコードを書いてくれました。)
function Encrypt-PdfWithITextSharp { <# .SYNOPSIS Encrypts the specified PDF file. .DESCRIPTION Encrypts a PDF file using the iTextSharp library. .PARAMETER InputPath The path to the PDF file to encrypt. .PARAMETER OutputPath The output path for the encrypted PDF file. .PARAMETER Password The encryption password for the PDF file. .PARAMETER iTextSharpPath The iTextSharpPath library file. .EXAMPLE Encrypt-PdfWithITextSharp -InputPath "C:\Input.pdf" -OutputPath "C:\Encrypted_Output.pdf" -Password "YourStrongPassword" #>
param ( [string]$InputPath, [string]$OutputPath, [string]$Password, [string]$ITextSharpPath )
# Load iTextSharp.dll if (-not ([System.AppDomain]::CurrentDomain.GetAssemblies() | Where-Object { $_.Location -eq $ITextSharpPath })) { Unblock-File -Path $iTextSharpPath; Add-Type -Path $ITextSharpPath } Write-Host ("{0}: InputPath:" -f $MyInvocation.MyCommand.Name); Write-Output $InputPath; Write-Host ("{0}: OutputPath:" -f $MyInvocation.MyCommand.Name); Write-Output $OutputPath; Write-Host ("{0}: ITextSharpPath:" -f $MyInvocation.MyCommand.Name); Write-Output $ITextSharpPath;
$permissions = [iTextSharp.text.pdf.PdfWriter]::ALLOW_PRINTING -bor [iTextSharp.text.pdf.PdfWriter]::ALLOW_COPY -bor [iTextSharp.text.pdf.PdfWriter]::ALLOW_MODIFY_ANNOTATIONS # Set permissions Write-Host ("{0}: permission set" -f $MyInvocation.MyCommand.Name);
try { # Create instances of PDFReader and PDFStamper $pdfReader = New-Object iTextSharp.text.pdf.PdfReader($InputPath) Write-Host ("{0}: PDF reader loaded.`n" -f $MyInvocation.MyCommand.Name); $pdfStamper = New-Object iTextSharp.text.pdf.PdfStamper($pdfReader, (New-Object System.IO.FileStream($OutputPath, [System.IO.FileMode]::Create))) Write-Host ("{0}: encrypting PDF.`n" -f $MyInvocation.MyCommand.Name);
# Encrypt the PDF $ownerPassword = $Password # Set owner password $userPassword = $Password # Set user password Write-Host ("{0}: ownerPassword:" -f $MyInvocation.MyCommand.Name); Write-Output $ownerPassword; Write-Host ("{0}: userPassword:" -f $MyInvocation.MyCommand.Name); Write-Output $userPassword; $pdfStamper.Writer.SetEncryption( [System.Text.Encoding]::UTF8.GetBytes($userPassword), [System.Text.Encoding]::UTF8.GetBytes($ownerPassword), $permissions, [iTextSharp.text.pdf.PdfWriter]::ENCRYPTION_AES_256 )
# Close PDFStamper and release resources Write-Host ("{0}: closing PDF.`n" -f $MyInvocation.MyCommand.Name); $pdfStamper.Close() $pdfReader.Close()
Write-Host ("{0}: PDF encryption complete.`n" -f $MyInvocation.MyCommand.Name); } catch { Write-Error "An error occurred during PDF encryption. Details: $($Error[0].Message)" }}
function Encrypt-MultiPdfWithITextSharp(){ <# .SYNOPSIS Encrypts multiple PDF files. .DESCRIPTION Encrypts multiple PDF files using the iTextSharp library. The output files are named with "_encrypted" appended before the .pdf extension. .PARAMETER ImgPathList An array of paths to the PDF files to encrypt. .PARAMETER Password The encryption password for the PDF files. .PARAMETER iTextSharpPath The path to the iTextSharp library DLL. .EXAMPLE Encrypt-MultiPdfWithITextSharp -ImgPathList $pdfFiles -Password "SecurePassword" -ITextSharpPath "C:\path\to\itextsharp.dll" #>
param ( [array]$ImgPathList, [string]$Password, [string]$ITextSharpPath )
# Get image files to add into PDF. foreach ($path in $imgPathList) { Write-Output $path; Write-Output $path.GetType().FullName; Write-Output $path.FullName.GetType().FullName;
$ext = ".pdf" $outputPath = $path.FullName.Replace($ext, "_encrypted{0}" -f $ext) Encrypt-PdfWithITextSharp -InputPath $path -OutputPath $outputPath -Password $Password -ITextSharpPath $iTextFilePath; }}
$targetFolder = (Get-Location).Path;$imgPathList = Get-ChildItem $targetFolder -Recurse -File -Include *.pdf -Exclude PDFsharp*;$password = Read-Host "Input password for encrypted PDF......";$iTextFilePath = "{0}\lib\itextsharp.dll" -f $targetFolder;
Encrypt-MultiPdfWithITextSharp -ImgPathList $imgPathList -Password $password -ITextSharpPath $iTextFilePath;
$tmp = Read-Host "Input 'y' to terminate this process......";Encrypt-MultiPdfWithITextSharpに一つのディレクトリ内にあるPDFの配列を渡して、Encrypt-PdfWithITextSharpで一つずつ暗号化していきます。
iTextSharpのDLLを読み込む際には、既に読み込まれているかどうかを判断してから読み込み処理に入るようにしています。
if (-not ([System.AppDomain]::CurrentDomain.GetAssemblies() | Where-Object { $_.Location -eq $ITextSharpPath })) { Unblock-File -Path $iTextSharpPath; Add-Type -Path $ITextSharpPath }$pdfReaderにPDFを開かせて、$pdfStamperに開いているPDFを暗号化してもらいます。
# Create instances of PDFReader and PDFStamper $pdfReader = New-Object iTextSharp.text.pdf.PdfReader($InputPath) Write-Host ("{0}: PDF reader loaded.`n" -f $MyInvocation.MyCommand.Name); $pdfStamper = New-Object iTextSharp.text.pdf.PdfStamper($pdfReader, (New-Object System.IO.FileStream($OutputPath, [System.IO.FileMode]::Create))) Write-Host ("{0}: encrypting PDF.`n" -f $MyInvocation.MyCommand.Name);$pdfStamperに暗号化してもらう時の処理はこんな感じで引数を指定をします。PDFのパスワードは2種類付けることが可能です。PDFのオーナー用と閲覧者用のパスワードです。$permissionsで、PDFのオーナーじゃないと行えなくなるアクションを設定します。(Adobe Acrobatでパスワードを付ける時は、確かオーナー用じゃないと印刷が出来なかった気がします。こんな風に仕分けられていたんですね。)
$permissions = [iTextSharp.text.pdf.PdfWriter]::ALLOW_PRINTING -bor [iTextSharp.text.pdf.PdfWriter]::ALLOW_COPY -bor [iTextSharp.text.pdf.PdfWriter]::ALLOW_MODIFY_ANNOTATIONS # Set permissions
$pdfStamper.Writer.SetEncryption( [System.Text.Encoding]::UTF8.GetBytes($userPassword), [System.Text.Encoding]::UTF8.GetBytes($ownerPassword), $permissions, [iTextSharp.text.pdf.PdfWriter]::ENCRYPTION_AES_256 )New-Objectをしたので、オブジェクトを解放することを忘れない。
$pdfStamper.Close() $pdfReader.Close()まとめ
今回は、iTextSharpをPowerShellで叩いて、PDFを暗号化する処理を実装する試みでした。
以下が、本記事のまとめです。
- iTextSharpは、
5.5.13をダウンロードした。おそらくこれが最新の安定版である。 - iTextSharpのDLLを読み込む際には、既に読み込まれているかどうかを判断することが出来る。
- PDFのパスワードは、オーナー用と閲覧者用の2種類を付けることが可能である。
New-Objectをしたので、オブジェクトを解放することを忘れない。
その他のPowerShell関連の記事
おしまい
以上になります!
記事を共有
この記事が役に立ったなら、ぜひ他の人と共有してください!
音楽
再生中なし